How to Create JWT Token Using LDAP and Spring Boot Part 1
If you are working in an enterprise infrastructures, chances are that you are using a centralized authentication system, most likely Active Directory or openLDAP. In this blog I’ll explore how to create a REST API using spring boot to authenticate against openLDAP and create a JWT token in return.
Before getting our hand dirty, we need to review the architecture of spring security and the way we want to utilise it, in a REST API endpoint. According to openLDAP, I’ve explained it’s concept briefly before, you can read more about it here. Also I’ll assume that you know how Spring Boot and JWT works.
Spring Security
In this example I will extend the WebSecurityConfigurerAdapter. This class will assist me to intercept security chain of spring security and insert openLDAP authentication adapter in between.
In fact this abstract class provides convenient methods for configuring spring security configuration using HTTPSecurity object.
First of all I injected three different beans as follows :
   private OpenLdapAuthenticationProvider openLdapAuthenticationProvider;
   private JwtAuthenticationEntryPoint jwtAuthenticationEntryPoint;
   private JwtRequestFilter jwtRequestFilter;
Then override the configure(AuthenticationManagerBuilder auth) :
 @Override
    protected void configure(AuthenticationManagerBuilder auth) throws Exception {
        auth.authenticationProvider(openLdapAuthenticationProvider);
    }
This will let us to override default behaviour of spring security authentication. In addition we need to override the configure(HttpSecurity httpSecurity):
    @Override
    protected void configure(HttpSecurity httpSecurity) throws Exception {
        // We don't need CSRF for this example
        httpSecurity
                .csrf().disable()
                .headers()
                .frameOptions()
                .deny()
                .and()
                // dont authenticate this particular request
                .authorizeRequests().antMatchers("/api/login").permitAll().
                // all other requests need to be authenticated
                antMatchers("/api/**").authenticated().and().
                // make sure we use stateless session; session won't be used to
                // store user's state.
                exceptionHandling().authenticationEntryPoint(jwtAuthenticationEntryPoint).and().sessionManagement()
                .sessionCreationPolicy(SessionCreationPolicy.STATELESS);
                // Add a filter to validate the tokens with every request
                httpSecurity.addFilterBefore(jwtRequestFilter, UsernamePasswordAuthenticationFilter.class);
    }
Also For the sake of manually authenticating a user in /api/login we will expose the authenticationManagerBean() :
  @Bean
    @Override
    public AuthenticationManager authenticationManagerBean() throws Exception {
        return super.authenticationManagerBean();
    }
After configuring WebSecurityConfig, I’ll provide my customer authentication adapter. This adapter will utilise spring’s LdapTemplate and let us to establish a connection to a LDAP server.
@Component
public class OpenLdapAuthenticationProvider implements AuthenticationProvider {

    @Autowired
    private LdapContextSource contextSource;

    private LdapTemplate ldapTemplate;

    @PostConstruct
    private void initContext() {
        contextSource.setUrl("ldap://1.1.1.1:389/ou=users,dc=www,dc=devcrutch,dc=com");
// I use anonymous binding so, no need to provide bind user/pass
        contextSource.setAnonymousReadOnly(true);
        contextSource.setUserDn("ou=users,");
        contextSource.afterPropertiesSet();
        ldapTemplate = new LdapTemplate(contextSource);
    }

    @Override
    public Authentication authenticate(Authentication authentication) throws AuthenticationException {

        Filter filter = new EqualsFilter("uid", authentication.getName());
        Boolean authenticate = ldapTemplate.authenticate(LdapUtils.emptyLdapName(), filter.encode(),
                authentication.getCredentials().toString());
        if (authenticate) {
            List<GrantedAuthority> grantedAuthorities = new ArrayList<>();
            grantedAuthorities.add(new SimpleGrantedAuthority("ROLE_USER"));
            UserDetails userDetails = new User(authentication.getName() ,authentication.getCredentials().toString()
                    ,grantedAuthorities);
            Authentication auth = new UsernamePasswordAuthenticationToken(userDetails,
                    authentication.getCredentials().toString() , grantedAuthorities);
            return auth;

        } else {
            return null;
        }
    }

    @Override
    public boolean supports(Class<?> authentication) {
        return authentication.equals(UsernamePasswordAuthenticationToken.class);
    }
}
Another part that we have to take into consideration is, implementing user login controller. Since we haven’t provided any filter for controlling username and password we ought to implementing it manually as follows :
@RestController
@RequestMapping("/api/login")
public class LoginController {

    @Autowired
    private AuthenticationManager authenticationManager;

    @Autowired
    private JwtTokenUtil jwtTokenUtil;

    @Autowired
    private UserService userService;


    @PostMapping
    public ResponseEntity<?> createAuthenticationToken(@RequestBody JwtRequest authenticationRequest) throws Exception
    {
        authenticate(authenticationRequest.getUsername(), authenticationRequest.getPassword());
        final User userDetails = userService.loadUserByUsername(authenticationRequest.getUsername());
        final String token = jwtTokenUtil.generateToken(userDetails);
        return ResponseEntity.ok(new JwtResponse(token));
    }

    private void authenticate(String username, String password) throws Exception {
        try {
            authenticationManager.authenticate(new UsernamePasswordAuthenticationToken(username, password));
        } catch (DisabledException e) {
            throw new Exception("USER_DISABLED", e);
        } catch (BadCredentialsException e) {
            throw new Exception("INVALID_CREDENTIALS", e);
        }
    }
}
These are the pillars of having a REST API + JWT + LDAP back-end using spring boot.
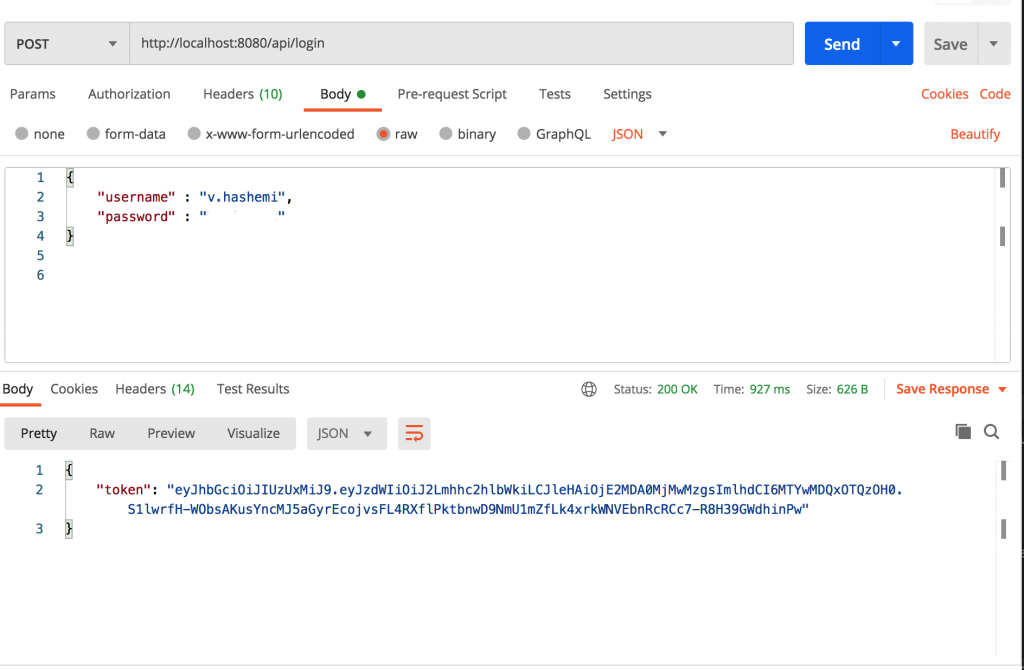
Now we can test the API using a REST client.
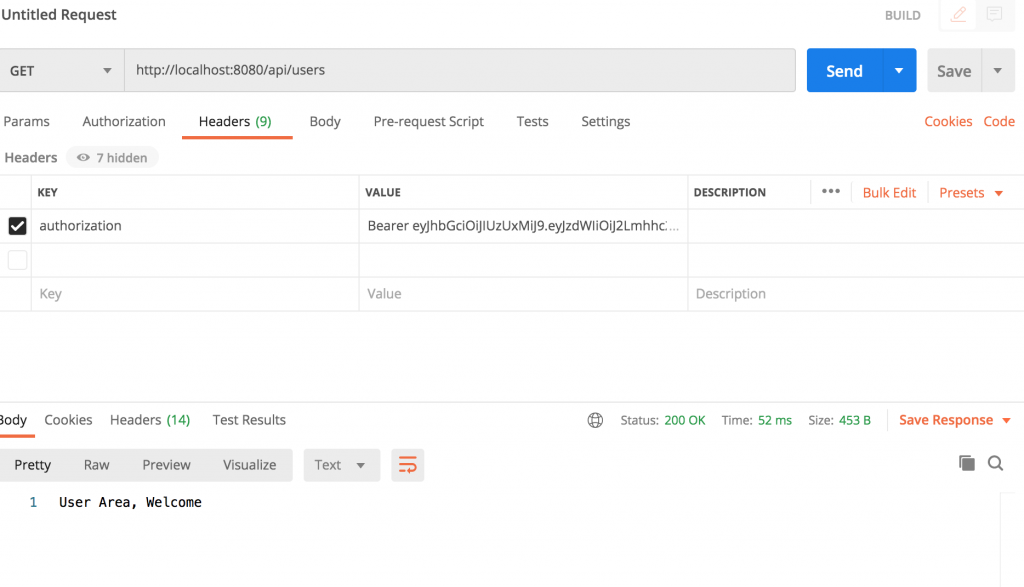
After getting the JWT token we can call authorized endpoints
You can find a working source code on my github.
For the next part I’ll make this code more concise.

My chief interest is software engineering, mainly dealing with Linux and Java projects, but also interested in teaching what I’ve learned, have published a couple of CBTs about programming in Persian (java/Android) and here I’ll share my thoughts and experiences in English as well.
barry
Great tutorial – is there going to be a part 2? I have questions! 🙂
-bc
Seyed Vahid Hashemi
Yeah, it’s possible to make it simpler.
Taps
Why you have created User Entity Object? If i dont have any user table, how we will proceed?
Seyed Vahid Hashemi
You can proceed without User Entity.
In my case, I intend to have a mirror of all LDAP’s users in a local database for further usages. e.g. I can assign user roles inside my own application regardless of their roles in LDAP.
Mourtalla
hello mister i want to know how can i do this part copy a all LDAP’s users in my local database for further and assign user roles inside my own application .
Ankit
can you please share code of your user service class, i want want to see what is there in loaduserbyusername method. it would be better if you can share entire code base, thanks
Seyed Vahid Hashemi
https://github.com/vahidhashemi/ldapjwt
Gennaro
Hi 🙂 thanks for this tutorial but I have a question: I’m always getting JWT token is expired exception..any advice about that?
Seyed Vahid Hashemi
Do you configure your expiration time correctly?
Gennaro
thanks for the reply…Yes I did and the error I’m getting says that the token has expired but always at the same date/hour..for instance: expired at 24/06 at 11.22…always
Huseyin
Hello. Im trying to do role based auth. using ldif file for LDAP. How should I make changes to this project?
Suresh
Why the loaduserbyusername method is not properly implemented? That is the important step everyone are looking for from LDAP service.
He just faked the loaduserbyusername method. Not loading it from actual LDAP.
Seyed Vahid Hashemi
No, for the sake of this example I just pass username from my own service you can rather get username from HTTP.
Jyoshna
I need example for LDAP for user and ADMin roles
Could plz provide
Seyed Vahid Hashemi
I might extend this example but the whole idea is creating different roles for users, in our real project we don’t rely on LDAP groups and assign admin capabilities to each user based on a admin_role table and a flag in our local database.
JI
Is it possible switch out to use ldapAuthenticationProvider to bind username and password and once you have the token, create a JPA service to retrieve authorities from database?